Monday, June 27, 2011

Jellyfish

Here's another pattern I did by Ana Paula. A JELLYFISH. Isn't it so cute!? :) I love it! :) She gave out this free jellyfish crochet pattern around Christmas time so people could make them and hang them up in their Christmas tree (awesome idea by Ana!). But, I found this pattern in late June so I have it pinned up on my bulletin board for now. :) When it comes around to Christmas time though, expect more of these cute little jellyfishes. :) So, if you want to make one of your own of these little fellas, click here.
In the meantime, I just wanted to let you know that I'll be gone for a week from blogging, but make sure that your return!! :) PLEASE COME BACK! So...for now, goodbye dear reader. :)
-HappyHands
Saturday, June 25, 2011

A Chicken & a Chick

That's right. It's a chicken and a chick. :) These are crocheted amigurumis from the retired (and now free) pattern by Ana Paula. You can get this cute little crochet pattern here.
The chick even has a cracked shell. :) Cute, right? :)
:)
-HappyHands

Thursday, June 23, 2011

I Love Red!

I went to Micheal's at 9am this morning. I was probably their first customer of the day... :)
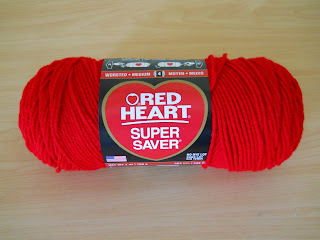
Well, while I was there I bought this red yarn. Not just any color red but...
Cherry Red. Yeah. :)
If I could choose two of my favorite colors in yarn it would be red and white. I think mushrooms are amazingly cute so red and white are what I LOVE to use to crochet them. What are your two favorite yarn colors? :)
-HappyHands

Wednesday, June 22, 2011

Doodle Stitching by Aimee Ray

This was my first official embroidery book: Doodle Stitching by Aimee Ray. It's a really cute book full of projects to make and to embellish with embroidery.
The first page... :)
Aimee Ray gives great instructions on how to get started on your embroidery projects...like choosing a design, which method of transfering would best fit your specific project, etc.
Doodle Stitching also has a great variety of different stitches and teaches you step by step on how to use them. (This how I learned a lot of my stitches.)
Here are a two projects I did from this book...
:) This is one of my all time favorite crafty books. I hope it'll be yours too. :)
-HappyHands

Tuesday, June 21, 2011

Sewing Machine Cover

If you were over at SewTara yesterday you would have seen her awesome sewing machine cover. It inspired me so much I just had to make one of my own. Do you like it? :)
-HappyHands

Monday, June 20, 2011

Disneyland "It's A Small World" Inspiration

I went to Disneyland yesterday for Father's Day. One of the rides I went on was, It's A Small World. Most likely you've heard of it or maybe you've actually been on the ride but I couldn't help but take some pictures of it. :) Just to let you know I didn't take the best pictures ever...but I hope you can still get what I'm trying to capture (By the way, it's kind of hard to take pictures while you're in a boat and all the dolls are dancing...).
Okay, I haven't gotten to the doll part yet, but look at these bushes (that were in front of It's A Small World ride)!! They are animals!! Awesome right? :)
A bear... :)
Hula girls. If only you could see them...not blurry.
Within the whole ride, they have Disney characters placed, wherever their movie was set in, in those themed areas. In this case, Ariel, was in Hawaii. :)
And of course they have these all over the park, but a hidden mickey made by a shadow of balloons is on the ceiling on the way out of the ride. :)
I thought it was pretty cool that when I got on the ride that I was place in the front row seat of the boat (thank you Jesus! :). He must have known that I really didn't want the back of someone's mickey ears in my pictures. :)
-HappyHands

Saturday, June 18, 2011

Cupcake Keychain

My latest creation- a cupcake keychain. I don't think I took the greatest picture of it but it turned out really cute. It's really tiny (which gives it extra cuteness) and is a sweet little pal. Bottom line is, I love it! :)
I think I'm going cupcake crazy. I made this cupcake keychain, baked cupcakes, made a cupcake pincushion, and I watched a show called Cupcake Wars. I mean, how much more can it get?
-HappyHands

Friday, June 17, 2011

Drawstring Coin Purse

I had way too many coins bulging out of my wallet so I wanted to make a coin purse of some sort to stick them in. So, I decided to make this cute drawstring coin purse. Like it? :) I've always loved drawstrings (like how you pull them open and closed so easily) so I knew I had to make my coin purse one! :) I picked out one of my favorite pieces of fabric and sewed one up. Coin problem solved. :)
-HappyHands

Thursday, June 16, 2011

I Spy Something Green...


I've been loving the color green lately. Green is such a summery color that has been getting me into the mood of hot days and popsicles and ice cream sandwhiches...(I have a sweet tooth just to let you know :). So today I just decided to take pictures around my "studio" of some of the green things I've collected...
Green embroidery floss...
Green ribbon...
An extra green leaf from my Felt Leaf Pillow...
Green yarn...
Green flower bulletin pin...
Green fabric...
Green thread...
The list can go on! :) Now, look around you; have you found anything green? :)
-HappyHands

Wednesday, June 15, 2011

My Fringed Arrow Cozy

Do you need a new ipod case? If you do, here's what you need to make! :) The Fringed Arrow Cozy designed by Michelle at Scissor Quirk. It's the perfect size for an ipod nano and a super cute cozy to give your ipod some unique style. Now that's what I call awesome! :)
To make one of your own, click here. :)
-HappyHands

Tuesday, June 14, 2011

My DIY Little Notebook

This morning I wanted to make something quick and easy but would be fun and cute. Ever have those days? hee hee :) So I was "surfing" through my favorite blog's free projects sections searching for something to do and I came across this little project. A DIY Little Notebook project designed by Sew Tara.
This project was so easy and convient to make. Basically all you need is scraps of paper (I used scrapbook paper, newspaper, actual notebook paper, and a bill envelope. Talk about a random quality of a notebook! :), card board, yarn, and a hole puncher. And in the end, it comes to this cute little notebook to write down your to do lists, grocery lists, etc.
To make one of your own, click here. :)
-HappyHands

Monday, June 13, 2011

My Bear & Bunny Dolls

These are my Bear and Bunny dolls! :) They are cute little squeezables that I was embroidering yesterday afternoon and this morning. I think they will look great in my little craft work space, and also cute little plushies to squeeze when I get super excited about a project. (I get excited about a lot of things just to let you know. :) These two tiny dolls are a freebie from Wee Wonderfuls. To make one of your own, click here. Have a happy Monday Funday! :)
-HappyHands

Saturday, June 11, 2011

My Felt Leaf Pillow

This is my Felt Leaf Pillow from the project designed by Aimee Ray. I really like how the leaves turned out, as of the flower I'm not as happy with; but, I think it still looks really cute. :) I was orginally hand sewing this project, but eventually lost patience by the third leaf (not much of a progress I must say). So I dropped this project for a few weeks until I finally realized that I could finish it using my sewing machine. Yes! :) So I brought this project back out yesterday and finished it. Woo hoo! :)
Want to make one of your own? Click here. Have a great crafty weekend! :)
-HappyHands

Friday, June 10, 2011

Needlebook tutorial

I've always wanted to make a needlebook. Didn't know how, just stared at other people's needlebook images on my favorite blogs for inspiration. Yesterday, I finally decided to sew one up and instead of keeping it to myself, I thought I would make this a tutorial. Before we get started, here's a little tour of this needlebook. :)
When you first open this book you come across a pocket holding a pair of scissors and a fabric marker, as well the first page holding a few pins.
Flip the page and you come across some needles. I know, I don't have very many right now on the second felt page, but I'm working on my collection. :)
And on the very last page is another pocket filled with my "in waiting to be winded on a spool" embroidery flosses. :)
Okey dokey, now here's the tutorial! :)
What you'll need:
  • Fabric (2 different fabric)
  • Felt (one large piece for inside page, and two optional tiny pieces of grey and tan)
  • Velcro (I used the sew on kind)
  • Optional: Embroidery floss (I used colors 3347 and 3712)
  • Nessary sewing tools

Cut two different pieces of fabric 27 centimeters wide and 18 centimeters long. Cut the pocket fabric 4" wide and 5 1/2" long; cut two. Cut the velco 1 1/2" long.
Hem the pocket fabric 1 1/2" in. Pin down. Repeat with second piece.
Folding a little bit of fabric underneath pocket fabric long sides, pin down 2" or more from side of inside needlebook piece of fabric (you will need this space for sewing down velcro as well sewing the needlebook together). Sew on the inside needlebook fabric. Do not sew bottom of pocket fabric pieces; they will close when done in later intstructions.
Next, pin down velcro on either side of inside needlebook fabric piece's edge. Pin down in the middle of edge's strip and sew.
Cut felt 17 centimeters wide and 19 centimeters long. Center on inside needlebook fabric piece, pin down, and sew down the middle.
Optional: Cut out a circle from a piece of tan felt and cut out a spool shape from grey\silver felt. Center felt spool on circle and use the satin stitch to embroider on top of it.
On the right side of needlebook cover fabric, pin down felt spool design, and use the running stitch and embroidery floss to sew down.
Pin felt page down towards the center of fabric so during sewing it will not get sewed down.
Pin the two needlebook pieces together, pretty sides facing each other. Mark an opening about 4" wide where you will flip out the fabric once sewed.
Sew together. During this process, the bottom of pockets will be closed.
Once finished sewing, snip the corners to get smooth edges. Be careful not to cut the stitching.
Turn inside out using the 4" opening. Unpin felt page.

Sew opening closed.
Iron.
You're done! :) Now sit back and admire your work. :)
-HappyHands
*FOR PERSONAL USE ONLY*
Related Posts Plugin for WordPress, Blogger...